Showing posts with label BOLT ACTION. Show all posts

Saturday, 8 March 2025

28MM HARBOUR (FOR U BOATS)

In order to play our u boat game we needed a dock/harbour. One that we could transport, one big enough to take two 28mm u boat (each 1 metre long).  So it would need to be long and sturdy.

This is what we did and how we did it.


U boat


We had some 40 mm thick blue foam sheets around 6 foot x 4 foot. We also were able to get hold of some dis-used signage boards (2mm thick foam board).  So we decided on a height (5 inch) that would place the submarine a lot lower to emphasis the height of the dock to a u boat. It would need to be in two sections for storage and transport.

 We thought it would look good if it had train /rail lines recessed into the ground and had perhaps a cobblestone and concrete look.

We used the foam board as a sturdy base and then covered it with the plasticard (to make it flat). Then placed wooden sticks along the front.


The height (5 inches) looked good (see previous post on the u boat - for more sub pictures) next to the boat.
28mm u boat

Its big...6 foot wide x 1 foot wide (5 inches tall).

Our intention is have two 6x4 tables (cobblestone mat and sea mat) but have one table with the legs heighten by the same height as the dock. Thus giving the sea level effect. 

 
With the wooden strips as supports
u boat 28mm

So we then had to choose on how we get the cobblestone effect. We could etch into thee board (that would take ages), put clay over it then whilst wet run a cobblestone roller over it. But in the end we went for simple and quick ...paper and double sided tape!

The next stage was to print out sheets of 28mm cobblestone (which  almost match our battlemats) and concrete. Then use concrete paper sheets to cover the dock front. We also burned into the surface with a foam burner blade to create the illusion of rail tracks. 

We then painted the entire track black then highlighted it with oily steel. Them stuck the sheet down with double sided tape.

Concrete papered


Painting the steel rail
We burnt in one set of train tracks and one set of crane tracks. This meant... we had to burn eight 6 foot straight lines! e.g. 2 sets of tracks x 2 rails with each rail needing 2 lines each side of the rail. A nightmare. LOL.


We then added mooring points, air brushed a water line mark for high tide and added dock drainage pipes on the front concrete wall.


We added ladders along the concrete front. But we used magnets to hold them ....mmmm not sure if its strong enough may just glue them. But it gets more fragile with more details. 
                                     
We also added "sea" to the bottom to blend into the battle mat.


Next is the dock cranes...we plan to adapt the Stalingrad cranes to run on rails...should be interesting ...with only 5 weeks to the Carronade wargame show 3rd May 2025.


Wednesday, 9 October 2024

28MM COMMANDO KAYAK

So after putting together the 28mm Commando land force...and putting some pictures on here - I had some comments (from the blog readers) and I had some more thoughts about my original inspiration - the old Airfix 1.72 guys .... they had boats and ladders! Now I have some 28mm ladders (but no boats) but I also assume commandos don't carry ladders on every operation especially on their kayak! So here is what I managed...and how I did it.

The end game...

28mm commando


Here is what I did...

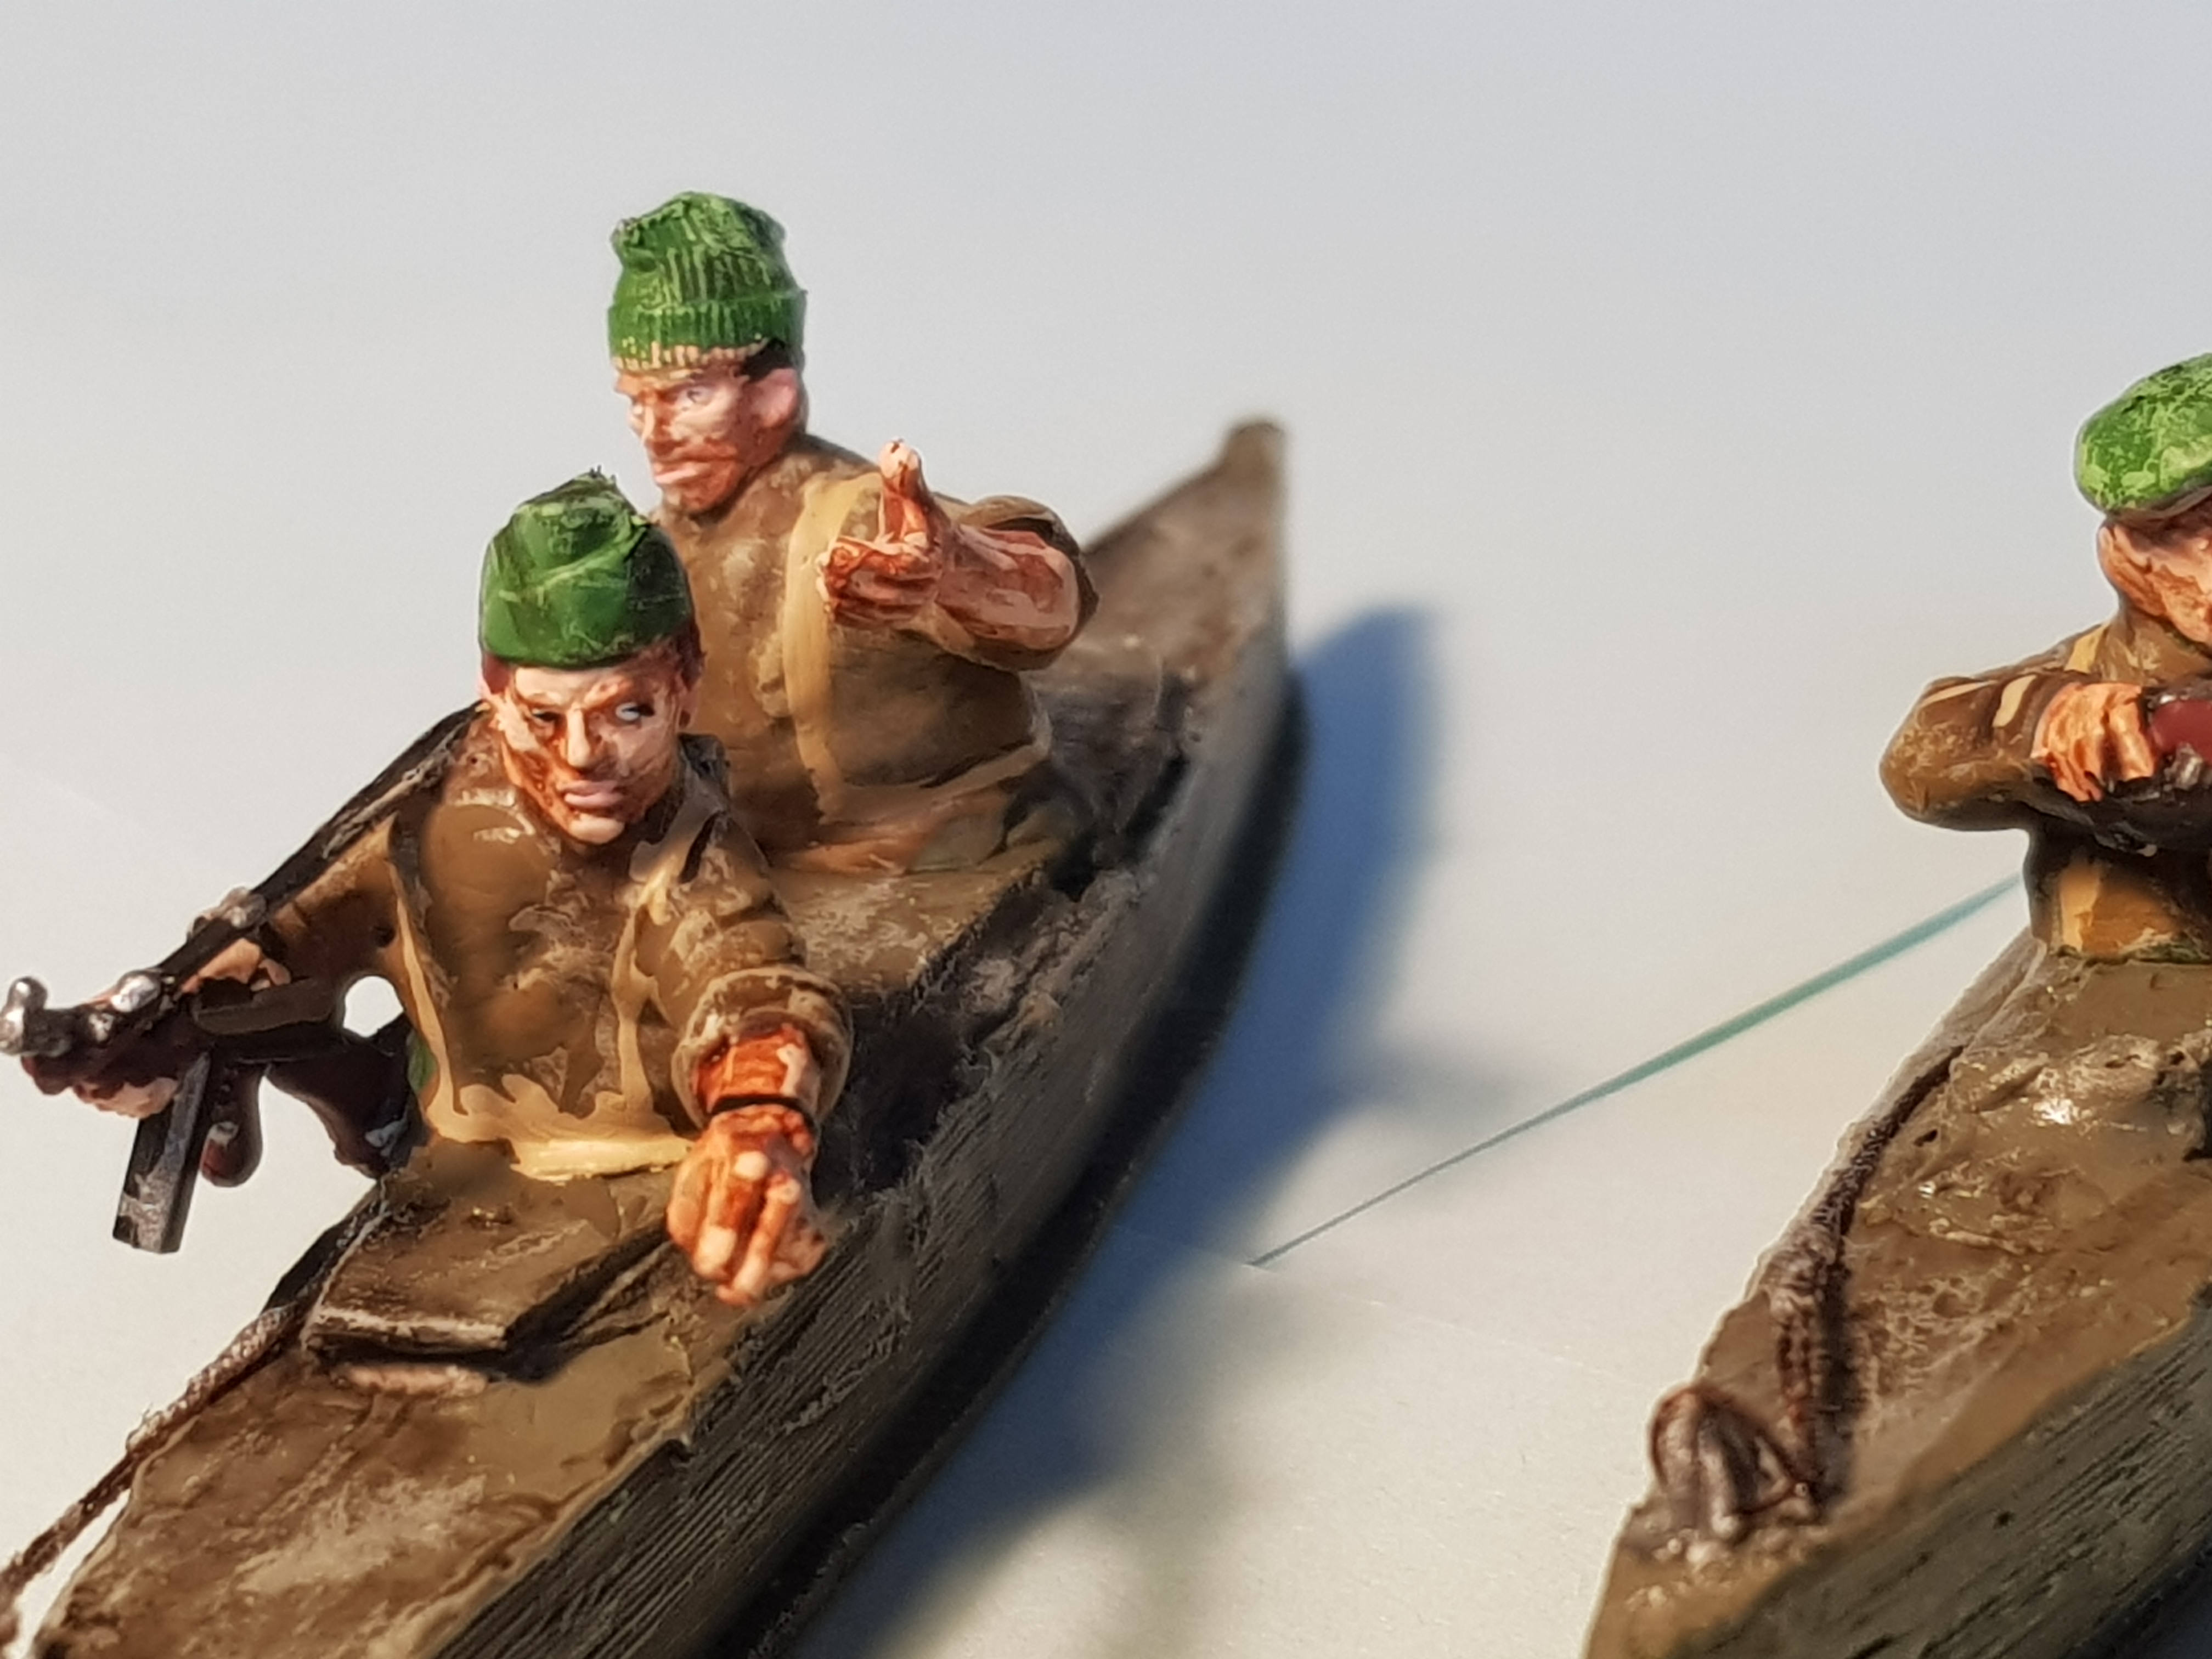
So I got out the 3d printer and started experimenting with kayaks. I printed out a test piece and it looked ok. But I would also need crew for it.

So out came the bits box and I manged to find some spare heads and arms (some were from the Warlord US Marines).  I then rolled out some green stuff and began the process of making some crew.

They were a bit rough to start out... 

                             28mm commando

But this was the result -at this stage.

28mm commando


With some causality markers...a boat anchor/tie up point was added to the front using wire and a small drill.
28mm commando

A thread was added to the it and passed to the front position.
28mm commando

28mm commando
I still need some paddles- or we will be up that creek without one!

So the next stage was to blend the kayaks into the battle mats. So I got out a hot glue gun.

What I did was run a thin glue line along the bottom of the boat. Pulling the glue upwards with a cocktail stick as it drys...but not too much or it dulls the glossy effect.  I have tried gloss varnish, mod podge etc. but I have found this to work best for me.


Then it was onto dark blue, light blue and white paint..in the sea bits of it.

28mm commando

So that at a distance it hopefully appears to moving or swishing in the the sea.
28mm commando


28mm commando


So now for those paddles...from reference photos they seem to have used various shapes. 
So out came the green stuff and I sourced some wire at the correct gauge - then I began cutting up the wire.

 
This was going to be tricky and time consuming. Small batches and small amounts is the key. Its tricky to shape. and green stuff drys out quickly. But I am hoping its stronger that the usual putty mix. The wire has a plastic coating which took paint easily.


I placed the paddles under the boat on the causality markers.


So that's a big chunk now done! 

The boat race can begin lol.


I think the beach is that way!


mmm... I might print out some "sunk/overturned" boats... watch this space...

and here they are some destroyed kayaks as markers!


So that is the Commandos DONE!
Well apart from these...LOL


Get that guy to the Doc!

All done!

Sunday, 22 September 2024

28mm WW2 German guards

 I saw these (Wargames Atlantic German sentries) and thought a dog team might look good on the dock as a patrol but I only got one sprue .

All the figures were cut from the plastic puddle bases and re based on clear circles.

28mm check point

Halt!

28mm sentry box
The figures are a good size to 28mm but the plastic material is a little softer than warlords.

The Kettenkraftrad was a free stl 3d print....but not the greatest quality. But as free stl gaming piece - I suppose ok. I might chop the drivers/riders head and replace it with a more detailed warlord one. 

28mm sentry box


"Lassie" looks a bit different. 
The design of the heads on the figure/ sprue - kind of make it less manoeuvrable. 
It leaves only one fixing position. Eyes front!

The pic below is before the helmet decals were applied. i need to extend his dog lead!

Might light up this guys cigarette for him...

So these will be useful as guards...


Wednesday, 22 March 2023

28mm Japanese FLAMES OF WAR

 28mm Japanese FLAMES OF WAR

Well its been a while since i posted so here's what's been going on...in preparation  for the Carronade Wargame Show in May 2023 - I just thought I would round off the flamethrower teams for our Pacific Game with some flickering flame effects.

I had tried these before and thought I would try a slightly different approach.  3 flickering battery candles (per flamethrower) glued together using hot glue and 4 coffee stirrers! and I needed a few so I did 4 of them. 

I then covered the whole lot in white cushion stuffing and got out the paint rattle cans..

The might need some thinning in some places as you can hardly see the lights...

You can see our full video by clicking here...


28mm flamethrower

I wanted it more orange and yellow and less black
28mm flamethrower

It looks ok next to the figures. Its really just to sit in front when its firing.
28mm flamethrower

So as well as these "flamers" I also noticed some pre assembled unpainted Warlord USMC on eBay. I don't usually buy pre made nor ones stuck to bases as I prefer clear bases nowadays. But the price was tempting and I  just thought why not.

Then just after this purchase I saw a full box of un made USMC - with only some weapons missing from the weapon spue...so you've guessed it... That Marine Army on the previous blog pages - just got even bigger.

Marine 28mm
Above: (Left to right) The box of of pre assembled Marines on bases, another 3d LVT1 (with insert), I also purchased 9off  .50 Cal in metal from Assault Group (and used 18 of the warlord Marine box troops as crew), the rest are carrying ammo boxes and are still to be based on clear bases (far right).   

I have kept 8 of these guys (assembled on bases) for eBay -as I now need to sell them to get some more foam storage. 
Marine 28mm


Below left: These included a metal  flamethrower team.


I added in some long grass /weeds but I wanted a sandy look overall.
Marine 28mm


The 3d printed insert troops for the LVT1 - I tried to design one of them standing on boxes handing out ammo over the side. That's why I wanted some ammo box carrying troops.


LVT

The 3d printed insert are just 3d printed legs, some green stuff and Warlord parts for the head and arms etc.

The HMG teams were based on clear bases from a new supplier - these were sourced on ebay and can be variable thicknesses but I choose 2mm thick. This would suite the metal HMG better that a 1mm thick. Those with keen eyes will spot 2 Browning HMG's on the bottom row (converted from Vickers) the rest are .50 cal.
28mm Marine

28mm Marine

I figure this was great inexpensive way to increase my heavy weapons.


Below - I made this set up just for a the look really - dragging a guy to safety...I was just using up the guys at this stage!
28mm Marine


The ammo carrying guys are still to be based...and I made up a wounded guy from green stuff (and bits) being carried by another Marine.
28mm Marine

A Marine is carried to safety...
28mm Marine
So now I need to sell some guys (assembled and painted - 8 off) on ebay to get some battle foam!!
I like to think this is me paying for the hobby! LOL

Check out the finished pacific game link on the right of the blog page.