We decided to place a 6x4 sea mat in front of our beach (for our next game). This meant increasing the number of waterline craft. We have 4 Higgins boat's already but needed more transport...
P.S. If anyone has any spare 28mm US heads please let us know (e mail ) -and we will give them a good home.
So here is the final part of the US Marine beach landing force...28mm scale. 3d printed.
These are our Landing Vehicle Tracked LVT1 ... 5 off full size (for on the beach), 2 off (plus 1 still printing) for near the shore line and 7 off waterline versions. White Numbers are still to be added to some of the LVTS at this point. Waterline and near shore versions have the wave effects.
I also had to buy another batch of plastic Warlord US Marines for use as HMG gunners. Thats me up to about 5 boxes of troops! But this also allowed me to fill the LVT waterline versions with half guys (made from green stuff and extra bits, arms heads etc.).
The waterline LVT's are 3d printed and a plastic clear base added to allow water effects. The water is a cheap white grab glue teased with cocktail sticks to form waves. Then painted.
The wrecked LVT 1 was tilted by myself on its side in the xyz software package.
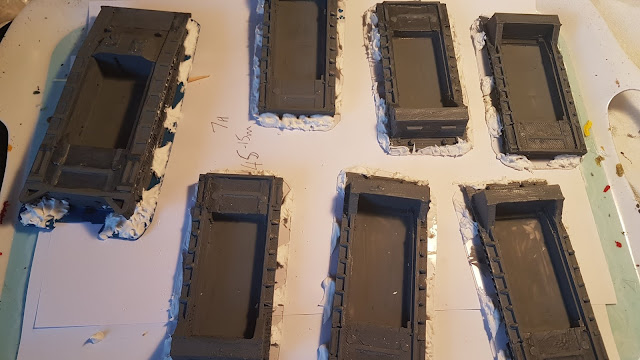
Above the actual result printed one (tilted on its side) in the printer ( I really need new bed tape!). This model still has the supports attached.. you can see the painted one below in the middle of the picture.
Above: wrecked LVT 1 variations for game play. If one is hit we can replace it with these models.
In the above picture the LVT2 waterline version can be seen top left.
I did the same (water / height) effect with some of the 3d printed Shermans. Also did two Sherman causalities and two waterline versions. (see previous posts on the Sherman build).
This is because the Sherman tanks also had to ' swim ashore ' in our Tarawa game.
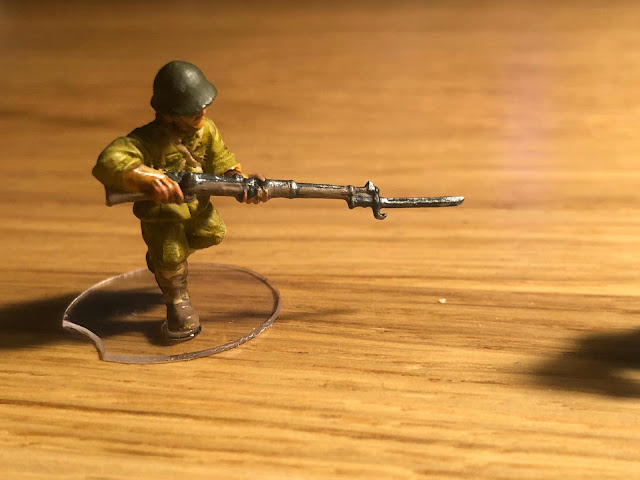
And the Japanese have arrived...as usual we used clear bases.

Below... a Flamethrower trooper variation modelled onto Warlord figures with a scratch built flame thrower.
We punch the bases out of clear A4 sheet. Figures are glued to the base with a 2 part epoxy.
We have used the Warlord Games Japanese Imperial Infantry and Japanese Marine boxes..
So that's were we are to date...its been a busy Christmas period producing the next game.
When we get to actually PLAY the next game is another different question....
your comments most welcome. See our other posts for the US troops.
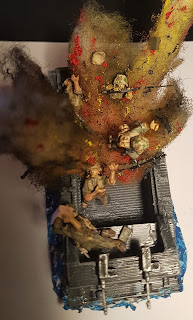
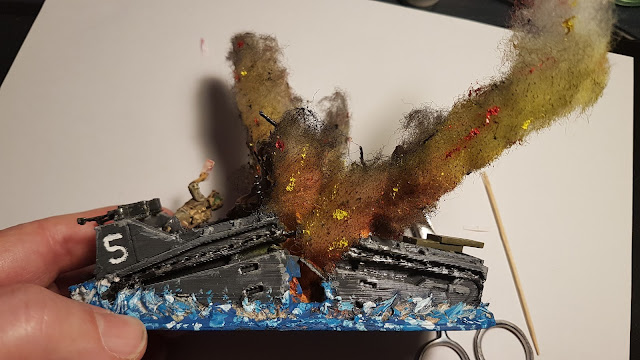
Below- This was a last minute thought.. I separated the LVT1 into two sections using the 3d software ... then tilted both sides by 30 degrees to make it look like it was forced into the water. Then added cocktail sticks using green stuff.
It looks a little messy but bare with me. Its all stuck down to a base.
Then I added some Marines and cotton stuffing. Which was then spray painted.
Kaaaboom.
The water was added with glue and painted
The 30 degree angle looks cool - as if it it is being pushed downward. On the right you can just see the ammo boxes are added - and the top one is siding off the LVT.


This collection just keeps getting better. Just Awesome GW- and you can never had too many LVTs !!
ReplyDeleteExactly John. The more LVTS the better...nothing works better than volume. Cheers.
ReplyDeleteThis is great and I also looked back in the archive to the Stalingrad game - phenomenal!
ReplyDeleteThis comment has been removed by the author.
ReplyDeleteThanks Ross I am glad you liked it. Stalingad was a great build with most of it done in a year by only the two of us. To hear you say it is ...Phenomenal is what we like !
ReplyDeleteHave a look at Omaha Beach as well.
Spectacular explosion effects, and beautiful minis!
ReplyDeleteThanks Phil... I am waiting to put them to good use hopefully some day soon!
ReplyDeleteCheers
What a project you have going there, its going to look superb when it all comes together. Love the destroyed transport.
ReplyDeleteThanks Pat. Yes we don't have space to try it out at the moment. But it should look "the part" whenever we can drag it all out with a bit of space.
ReplyDeleteVery nice prints. Looks like you are getting ready for major landing in the Pacific
ReplyDeleteHi Gary - yes we are packed up and ready to hit the beach! But I don't see it being anytime soon. LOL
ReplyDeleteLooks mint, maybe some gloss varnish or modgepodge on the water to make it look wet
ReplyDeleteHi Pitchfork Yeap absolutely I did try some gloss varnish - even tried just poly glue on some of them. Not sure if I used enough varnish on my tests. But glue was a NO. Might try more varnish again....cheers
ReplyDelete