Friday, 28 January 2022

LVT 1 V Japanese (28mm)

 I managed to get a box of Warlords 28mm Japanese Imperial Army for Christmas (we already have 2 other boxes and the Japanese Marine Box). But these were built by another Warhog so I thought these would be something different for me.


I had seen a painting video on u tube and my idea was to also to test out the Citadel paint washes. These washes are applied over a dull white base. So we wanted to see what the difference was between the washes and the Vallejo / model colour Japanese uniform(which is our usual colour).

I have to say I found the washes for the uniform, helmet and faces great but I personally prefer the webbing straps in paint rather than a wash. You also need to be careful when touching in your paintwork....if you "over wash" an area it needs to go back to the white base coat and start again. But they did provide a nice finish.

Also as you will see from our previous posts we hate wasting any parts (see the "wading Marines" in our earlier posts).and after viewing John Bonds wargaming blog - the post on his blog (27 Nov last year ) -  I really liked the idea of some Japanese in trenches for our Pacific game. John has some excellent examples...have a peek.

So to use up the spare Japanese parts I did these at the same time as experimenting with the colour washes...

The Japanese colour washed infantry were placed on our punched out clear acetate bases.

We really like the clear bases but sometimes the flash makes them look more "glossy". We have in the past experimented with matt varnishes (brush and spray) but they all tend to cloud the finish - so we now just leave them untouched.

LVT1

I pulled out our mats to get some photos and to ensure they blended..

The Japanese (in trenches/spider holes)  were made from the spare parts and green stuff (Kneedite).LVT 1


"Washed" painted Japanese...

In John's Blog he cuts the actual figures and I have cut guys in the past for wading etc. but this was just about using up the spares I have ...
So I managed to get about 21 extra guys out of the Warlord box. That's a fair amount of extra guys for nearly nothing. 

.  
28mm Japanese Infantry
They blend in nicely with the Deep Cut mat.

The LVT1 below is about to be overrun!
28mm Japanese Infantry


Even if you only use them as dug-in "markers" then use full size for further movement - it adds to the game.

It was definitely worth the time...you get more guys for your table top and you don't waste any parts...(unless of course you want the detail of the actual body).  
28mm Japanese Infantry
All of the Japanese in this post were painted with the washes. 
See our previous posts for Model Colour Japanese Uniform.

As I said earlier - i especially like the washes on the uniform. Overall it gives a lighter appearance to the figures.


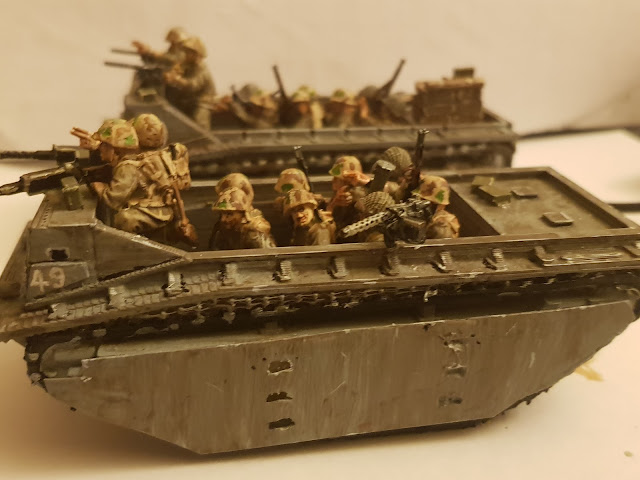
Also I was able to design a small troop insert for the 3d printed LVT1.
The challenge here was to get as many troops in the LVT1 as possible 
(the actual LVT could carry 18 troops - they would have been packed in!).

After looking at the Warlord Marines I decided these were unsuitable due to the wide stances and poses.
They would take up too much space. I needed them standing upright with their feet close together.

So I took a 3d figure into the 3d software and halved it in two. Then using the legs I scaled it to 28mm. Multiplied it (x8) times. Then because I wanted to be able to remove them - I had to leave clearances around all of the sides (for an access gap). So that i could lift them out the LVT.

I also added a 2mm fixed base across all of them to save me gluing the figures on. The figures were rotated slightly (at the design stage) to ensure they all appeared slightly different. But all were "standing" to ensure the maximum number were as close together as possible.
 
  The access gap greatly reduced the space available inside.

3d troop insert
I placed some green stuff on some of the thinner areas.


I then broke into the spares box for heads, packs, arms and weapons. 
The upper body was green stuff and attached straight onto the 3d print.
They were painted up . I was also aware that only the top would be visible when in use.

LVT1
So I managed to get 8 guys into the space easily. 
This is my "representation" of the filled LVT vehicle for gaming.


The effect turned out ok and the insert can be replaced with a full set of standing figures when outside the LVT.

I might add some more green stuff on the top of the backpacks for the camouflaged marine  ponchos.

LVT1

Ready to rumble...So I then went into production mode and I've just finished the 7th troop insert.

I did one with ammo boxes at the front for some variation.


These should fill out the LVTs nicely. I ended up with an extra 52 guys.
28mm Marine

This "Chow" line keeps getting bigger LOL


So that seemed to work out...now to get them on the table.


Monday, 24 January 2022

LVT 1 28mm WW2

 LVT 1 with the extra armour plate.

After further research I noticed some LVTs had extra armour plate at Tarawa...So I re visited the 28mm 3d print and added a front plate, small peep holes on the sides.

It now looks closer to the the original pics that are on the web that I have seen.


LVT1 28mm
 28mm LVT 1 - extra plate on sides and front


The sides have a small peep hole and one on the front. These were to protect the driver. 

LVT1 28mm
Warlord Games Marines added (with the US paratrooper HMGs used as arms). Also changed the rear 


Monday, 6 December 2021

28mm WW2 Marines

 28mm WW2 Marines.


See link to finished Pacific game on right...

28mm Marines

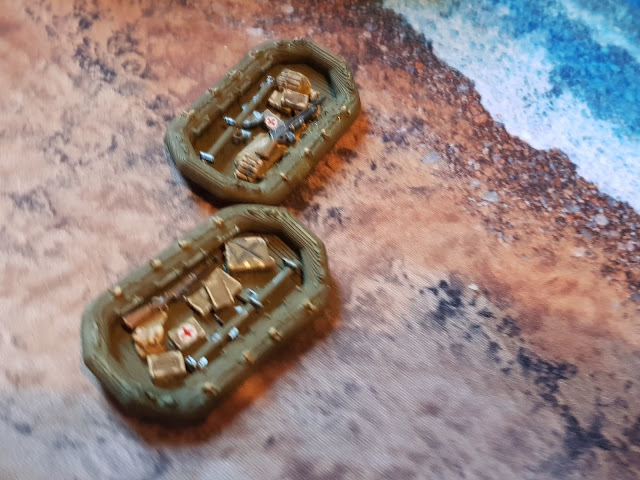
..I could see from our research that some gear was placed in rubber boats to bring to the shore...So I tried out some new 3d prints.


The prints are to be used for our Pacific Assault game but as soon as I started to think about these the old Airfix 1:72 scale Marines pack came to mind. I remember they had a dingy and paddling Marines in the pack as well! . 

So these 4 were printed 

Pulled out a mat to see how they (painted up) and looked on table - and I think they look ok.
Placed some guys at the front pulling it in and filled it with some ammo boxes etc. 
28mm Marine
28mm Marines

Placed some other guys wading in around them for scale.
28mm Marine


This type of dingy was used to ferry in ammo etc.
28mm Marine

28mm Pacific

28mm Pacific wargame


28mm Pacific
I left this one with just one guy pulling it...the other guy is MIA.

Wading Marines are...  "A Plenty"

28mm Pacific
So I think it was successful.


Monday, 18 October 2021

LVT 1 28mm damage markers

 LVT 28mm Damage Marker

So I did a few markers for the Pacific game. Four of them... for the land/beach side of our game.

The markers will help us to playthrough the game and continue to re-use the fully made LVT1 we have whilst marking how the game progresses.

As usual the LVT1's are 3d prints but are fixed to a base and some rubble added. The green stuff is used to create small wheels and the torsos for casualty figures.

I tried to make the LVT's look burnt out. This means we will have markers for both the sea mat and land mats.


LVT 28mm

From pictures the actual numbers on LVT's were quite roughly hand painted (not stencilled).

 
With one marker "just hit"...to add a bit of movement to the board..
LVT 28mm
The usual explosion effect - wire or cocktail sticks covered with stuffing., sprayed and painted. Two LVT 1 sections were angled and printed. Rifles, helmets etc. were added to the blast.

This was a bigger 3d LVT section sliced at an angle. Then added to a foam base. With scattered rifles, ammo cases, pouches etc. Green stuff used as burst track, wheels etc.
LVT 28mm

LVT 28mm

LVT 28mm

So the 3d prints are mounted on plasticard or a blue foam base 
(high density foam cut to the shape using hot wire cutter).


Monday, 20 September 2021

28mm Coastal Gun

 28mm Coastal Gun

28mm coastal gun

As well as our jungle plant terrain we needed an 8 inch coastal gun (well "need" is a bit strong -we thought it would look authentic if we had one! LOL)  to represent the ones used on the Tarawa atoll.

No one manufactures one that actually looks like the ones on the Tarawa beach so... 

I ended up drawing one in 3d using Tinkercad. Then I would try to 3d print it.

So I draughted out a shape and imported it to the 3d XYZ printer software. It took a while to get the shape...near the actual (and making sure it looked ok at 28mm and strong (thick) enough to  use for gaming).


28mm Coastal Gun


28mm Coastal Gun

If you look at a Google search for Tarawa costal guns you will see lots of refence pics...
Its basically a turret gun which the turret has been cut away. Probably due to heat.

An example of an actual gun on Tarawa, some have doors (square doors some half circle at top) some have not. 
There is a slight angle on the front curved face from top to bottom on the original. 
So I need to make it so!

28mm Coastal Gun
But the print is ok.

28mm coastal gun
The roof and rear of the turret are gone they cut them off.

28mm Coastal Gun
I then used an 88 gun breach and extended it - the barrel (and diameter). 
The base of the gun chassis was given a magnet to attach to the casement base - to enable easier storage.

I then had to add some filler to get the angle on the front top to bottom. 
My 3d drawing skills were not able to work out the angle on the curve! 

Looks ok when painted up  Most have a small window cut into the side.

Then I added some "vintage WW2" posters and a camouflage net. 
A lot of the actual gun pictures show camo net or cloth material over the firing area. 
I assume they roll it to the side for action stations. But its so big they would need it. 
28mm coastal gun

28mm coastal gun
The radio, table and map were added - I don't know if they will stay as I still need to get the crew inside! The GI figure is just for scale.

28mm coastal gun
and yes ...its a map of Tarawa on the table

28mm coastal gun


Overall it looks ok and can now represent the type of 8 inch gun we need on Tarawa.

  So now I just need to get a crew...
.28mm coastal gun


Monday, 30 August 2021

28mm Jungle Terrain

 28mm Jungle Terrain

For our Pacific beach game I also found a small MDF hut/building. So to enhance it I cut up some bristles from an old paint brush and glued them onto the roof, drilled out some windows and put in some 3d printed shutters, then placed  more bristles on them, printed some chairs and a table...


The flag pole has a magnet on the base for storage.

28mm Jungle


Some propaganda posters were printed and added. I also raised the original kit onto some stilts to make it look better. Then had to add a ladder.
28mm Jungle Terrain

28mm Jungle Terrain
Above: If you look close enough on the map you might be able to see/guess which island we heading for  lol. Its Tarawa!


28mm Jungle Terrain
It turned out ok for a quick conversion of a mdf kit that was just lying around. 
The side widows were added and a window frame 3d printed.

Also see our previous post on the Pacific and our u tube video.